How to Tie a Tautline Hitch
Everybody has his own favorite knot for tying down an airplane. In our flying club, we see everything from a useless half-hitch to macramé. One of the best tie-down knots is the Tautline Hitch, which will hold securely but is easy to adjust and untie. Here it is, in four easy steps.
In the photos here, the yellow tint identifies the standing part, which is the part of the tiedown line that doesn't move. It's firmly attached to the ground at the lower end, and it loops through the airplane's tie-down ring at the top. While you're tying this hitch, the standing end is always under tension because you're pulling on the part with the purple tint.
This hitch can, and should, be tied without ever letting go of the part with the purple tint. Hold that part in your right hand, and tie the knot with your left.
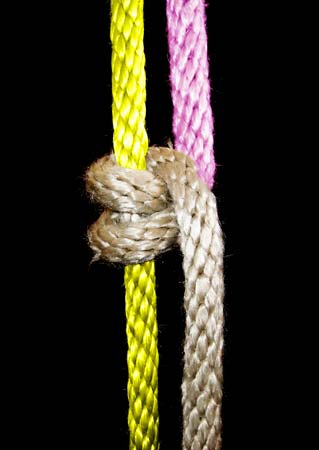
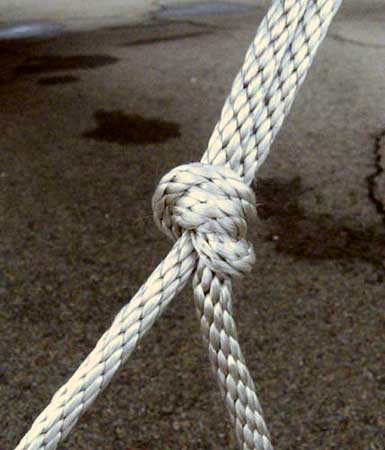
Start by looping the tie-down line through the ring on the airplane, and take hold of the free end somewhere along the part that's tinted purple in these illustrations. Don't let go of the purple part until the knot is finished! Begin with one hitching loop inside another, as shown here:
If you apply enough tension to the hitch, this is a good enough beginning. But the knot will hold better if you cross the first two loops, like this:
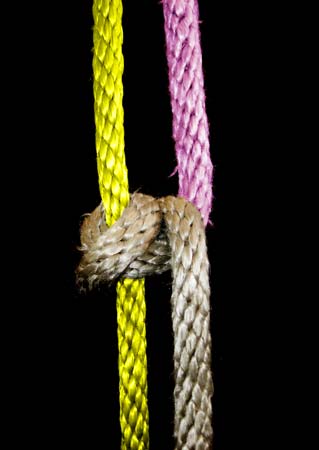
The only difference between the two photos above is that the second (upper) loop has been moved a little so it crosses the first loop.
Notice how a little tension actually makes the (yellow) standing part of the rope bend slightly. This knot will hold in a hurricane, but it's easy to adjust — just take out a little tension and it slides easily. But it won't stay put unless you finish it with another half-hitch, like so:
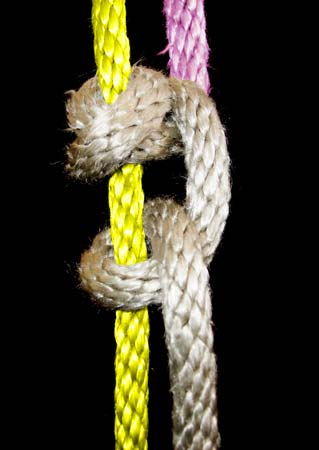
The half-hitch should be slid up to the two crossed loops. It's left a little loose here, so the photos would show clearly what's going on.
Finally, you don't really need to pull the free end all the way through. The finishing half-hitch could be made with a slip, like this:
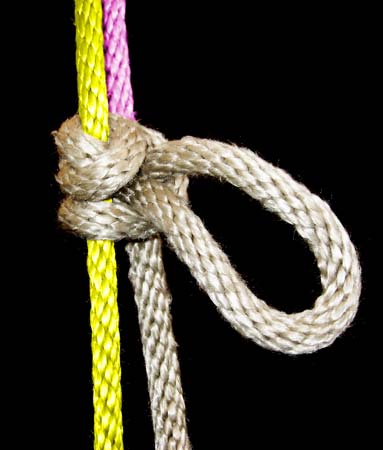
This holds the knot securely in place, but it is extremely easy to untie. Just pull out the slip, and the rest of the knot almost unties itself.
Are you still holding the part with the purple tint? Pull on it to take up any slack, slide the hitch down the standing part, and you're done.
This is one of the best hitching knots there is.
|
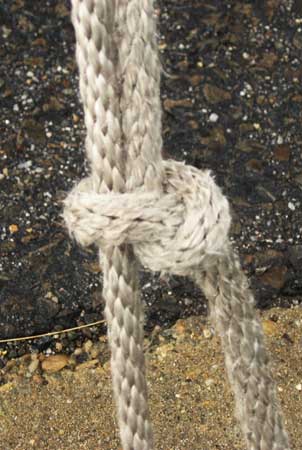
This is one of the worst knots I've ever seen. It slips easily when strained, making it useless at holding an airplane still. Furthermore, it's extremely difficult to untie. If it's wet (or — worse — frozen), it's just about impossible to untie. But it will still slip easily. We had a pilot in the club (since reformed) who tied three of these monstrosities in each tie-down line. |

|
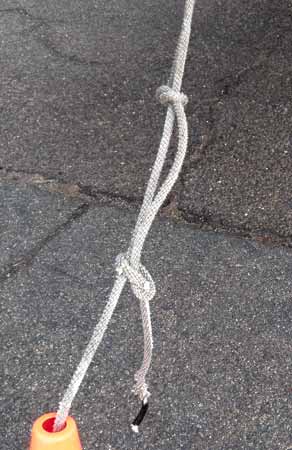
Here's another slip knot. It's just as insecure as the previous example, but at least it's a little easier to untie. The pilot used two of these, about a foot apart. |
|
Yet another slip knot. |
|
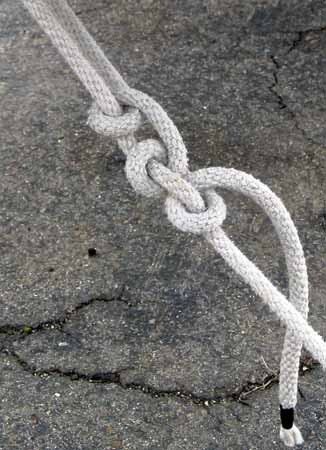
Just two overhand knots. Why bother? |
|
Another no-name knot. It might hold in light to moderate wind, but looks like it would be hard to untie if it froze. |